|
contents | news | |||||||||
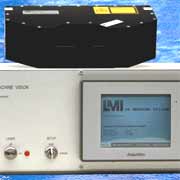
| Laser Sensor measures thickness and profile of glass  LMI Technologies, Inc. has introduced a new and improved glass thickness and profiling laser sensor with all software functions operating inside the sensor head, eliminating the need for a separate controller for reduced implementation cost. The FDA Class II visible Glass Thickness Sensor from LMI Technologies uses laser triangulation to measure flat panel glass up to 1.5 mm thick and other flat glass up to 3.0 mm thick at speeds of up to 2,000 readings per second. This makes the sensor ideal for on and off line thickness and distance measurements, either fixed positions or on scanning mechanisms, to provide reliable and repeatable results in quality control environments. Stand off distance is 28 mm and measurement range is 4.0 mm. LMI Technologies, Inc. has introduced a new and improved glass thickness and profiling laser sensor with all software functions operating inside the sensor head, eliminating the need for a separate controller for reduced implementation cost. The FDA Class II visible Glass Thickness Sensor from LMI Technologies uses laser triangulation to measure flat panel glass up to 1.5 mm thick and other flat glass up to 3.0 mm thick at speeds of up to 2,000 readings per second. This makes the sensor ideal for on and off line thickness and distance measurements, either fixed positions or on scanning mechanisms, to provide reliable and repeatable results in quality control environments. Stand off distance is 28 mm and measurement range is 4.0 mm.Data collection and control software functions are integrated within the laser head for added efficiency. This gives LMI Technologies the capability to support customized sensor algorithms and to write specific software applications inside the sensor head while communicating directly to a controller or PC with a RS-485 protocol for fast and economic digital data communication. The GTS2 sensor sends a laser beam onto the precision glass being measured at an angle of 49 degrees from the perpendicular. Using one detector, the single line of incident laser-light reflects from both surfaces of the glass and is projected back into the sensor´s detector to provide the thickness data. Besides a Thickness Output, the GTS2 measures the distance to the top surface of the glass. This makes it possible to measure the location of the measured surface accurately and consistently as well as measure thickness to better than 0.0005 refractive repeatability. Accuracy is +/-1.0 um. Single side measurement of thickness simplifies implementation since only one sensor is required. The sensor uses a Charged Coupled Device single line array to calculate the distance between the projected top surface and the bottom surface reflections. By using CCD technology, the image can be filtered or otherwise processed to pinpoint the center of gravity of both surface reflections. The CCD technology can also remove unwanted multiple spots, reflections or other stray light common in difficult-to-measure glass applications. write your comments about the article :: © 2005 Construction News :: home page |